
You can spend money on great furniture and still lose viewings if the layout feels tight, awkward, or simply “not liveable” when someone walks in. The quickest way to fix that is to measure like a stager, not like a decorator, so you can prove the home works in real life. In this guide to Staging Measurements: Modern vs Period Properties, we show you what to measure, what clearances matter, and how to turn numbers into a layout that photographs well and sells with less friction. We use the same practical approach we apply on site: measure first, place second, then style for emotion.
Key Takeaways
- Staging measurements are essential to demonstrate a home’s practicality, reducing buyer doubt by proving how living spaces work in real life.
- Modern properties require focus on clear walkways, zoning open-plan areas, and showing functional work-from-home spots to meet buyer expectations.
- Period homes need careful balance around features like chimney breasts and alcoves to maintain character while ensuring comfortable circulation and usability.
- Key measurements for staging include maintaining main walkway clearances (800–900mm), realistic furniture-to-feature distances (e.g., sofa to TV 2.2–3.0m), and appropriate scale cues to make spaces feel usable.
- Accurate physical staging measurements must survive real use tests, while virtual staging demands conservative furniture sizing and credible clearances to avoid misleading buyers.
- Starting staging plans with a timed, measurement-led routine saves time, prevents costly furniture returns, and prioritises rooms that most influence buyer perceptions and offers.
Period Vs Modern Properties: What Changes In Space, Flow And Buyer Expectations
Walk into a vacant new-build and buyers often say, “It’s smaller than I expected.” Walk into a vacant period house and they say, “Where would we put the sofa?” The property type changes the questions people ask in their heads, which means it changes the staging measurements you need to prove the answer.
Modern homes tend to sell on flow, light, and flexibility. You usually stage to show:
- Clear sightlines across open-plan spaces (so buyers instantly understand where living ends and dining starts).
- Practical work-from-home options, even if it’s just a 1000–1200mm-wide desk zone in a corner.
- Storage and everyday function, because buyers expect clean lines and clutter-free living.
In real terms, that means you measure routes (walkways through the space) just as much as you measure walls. A modern open-plan room can be 25m² and still feel wrong if you choke the main walkway down to 500mm with an oversized sofa.
Period homes tend to sell on character and reassurance. Buyers want to keep the fireplace, the cornice, the sash windows… but they also want to see normal life working around them. So you stage to show:
- A sensible focal point (often the chimney breast, sometimes a bay window, sometimes a feature wall).
- Balanced proportions around alcoves and odd angles.
- Comfortable circulation through narrower halls and segmented rooms.
That’s why the same “standard” sofa that works in a modern lounge can make a Victorian front room feel pinched if the chimney breast projects and steals 250–400mm of depth where you need it most.
If you’re deciding whether staging is worth it on a specific property, it helps to ground the conversation in outcomes (speed, offers, quality enquiries) rather than aesthetics. The commercial case is covered well in why home staging matters for sale and rental performance, and it’s the same principle here: measurements reduce buyer doubt because they make the home feel instantly usable.
The Staging Measurements That Matter Most (And Why They Sell Homes Faster)
Most sales resistance in empty homes sounds emotional (“It feels small”), but it comes from a practical fear: “Will my life fit?” The measurements that matter are the ones that remove that fear at a glance.
1) Circulation clearances (your non-negotiables)
If you only measure one thing, measure walkways. When buyers can move naturally, they relax and start imagining their own furniture.
Use these as working targets:
- Main walkways: aim for 800–900mm so two people can pass without turning sideways.
- Secondary gaps (beside a sofa, to a window, to a cupboard): aim for 600–750mm.
- Dining chair pull-back: allow 900mm behind a chair so it feels comfortable, not forced.
Actionable step: pick the primary route from door → focal point (fireplace / TV wall / garden doors) and protect that width first. Everything else sits around it.
2) “Can I use this?” distances (so rooms stop feeling theoretical)
A staged room sells faster when it demonstrates real-life distances buyers recognise.
- Sofa to TV / focal wall: typically 2.2–3.0m reads as realistic in photos and on viewings.
- Kitchen aisles: keep 1000–1200mm between runs or around an island so it looks usable.
- Bed access: allow 600mm each side where possible, and 750mm at the foot of the bed so it doesn’t look like you have to shuffle.
Actionable step: if a room cannot hit the ideal clearances, don’t try to “force” the full function. Stage it as a different use (for example, a box room becomes an office, not a cramped double).
3) Scale cues (the silent confidence builders)
Buyers judge size by comparison. The right-sized furniture gives them a “this works” signal within seconds.
- In compact rooms, a 1600–1800mm sofa often sells better than a 2200mm sofa because it protects circulation.
- A 1200–1400mm dining table can read as generous if you keep 800–900mm around it.
If you’re working with a developer or vendor who worries staging is “just cushions”, bring them back to this: measurements protect the marketing story. Strong staging plus strong photography often supports stronger offers: if that’s the goal, you may find our guide on practical steps to sell over asking useful because it connects presentation to buyer behaviour.
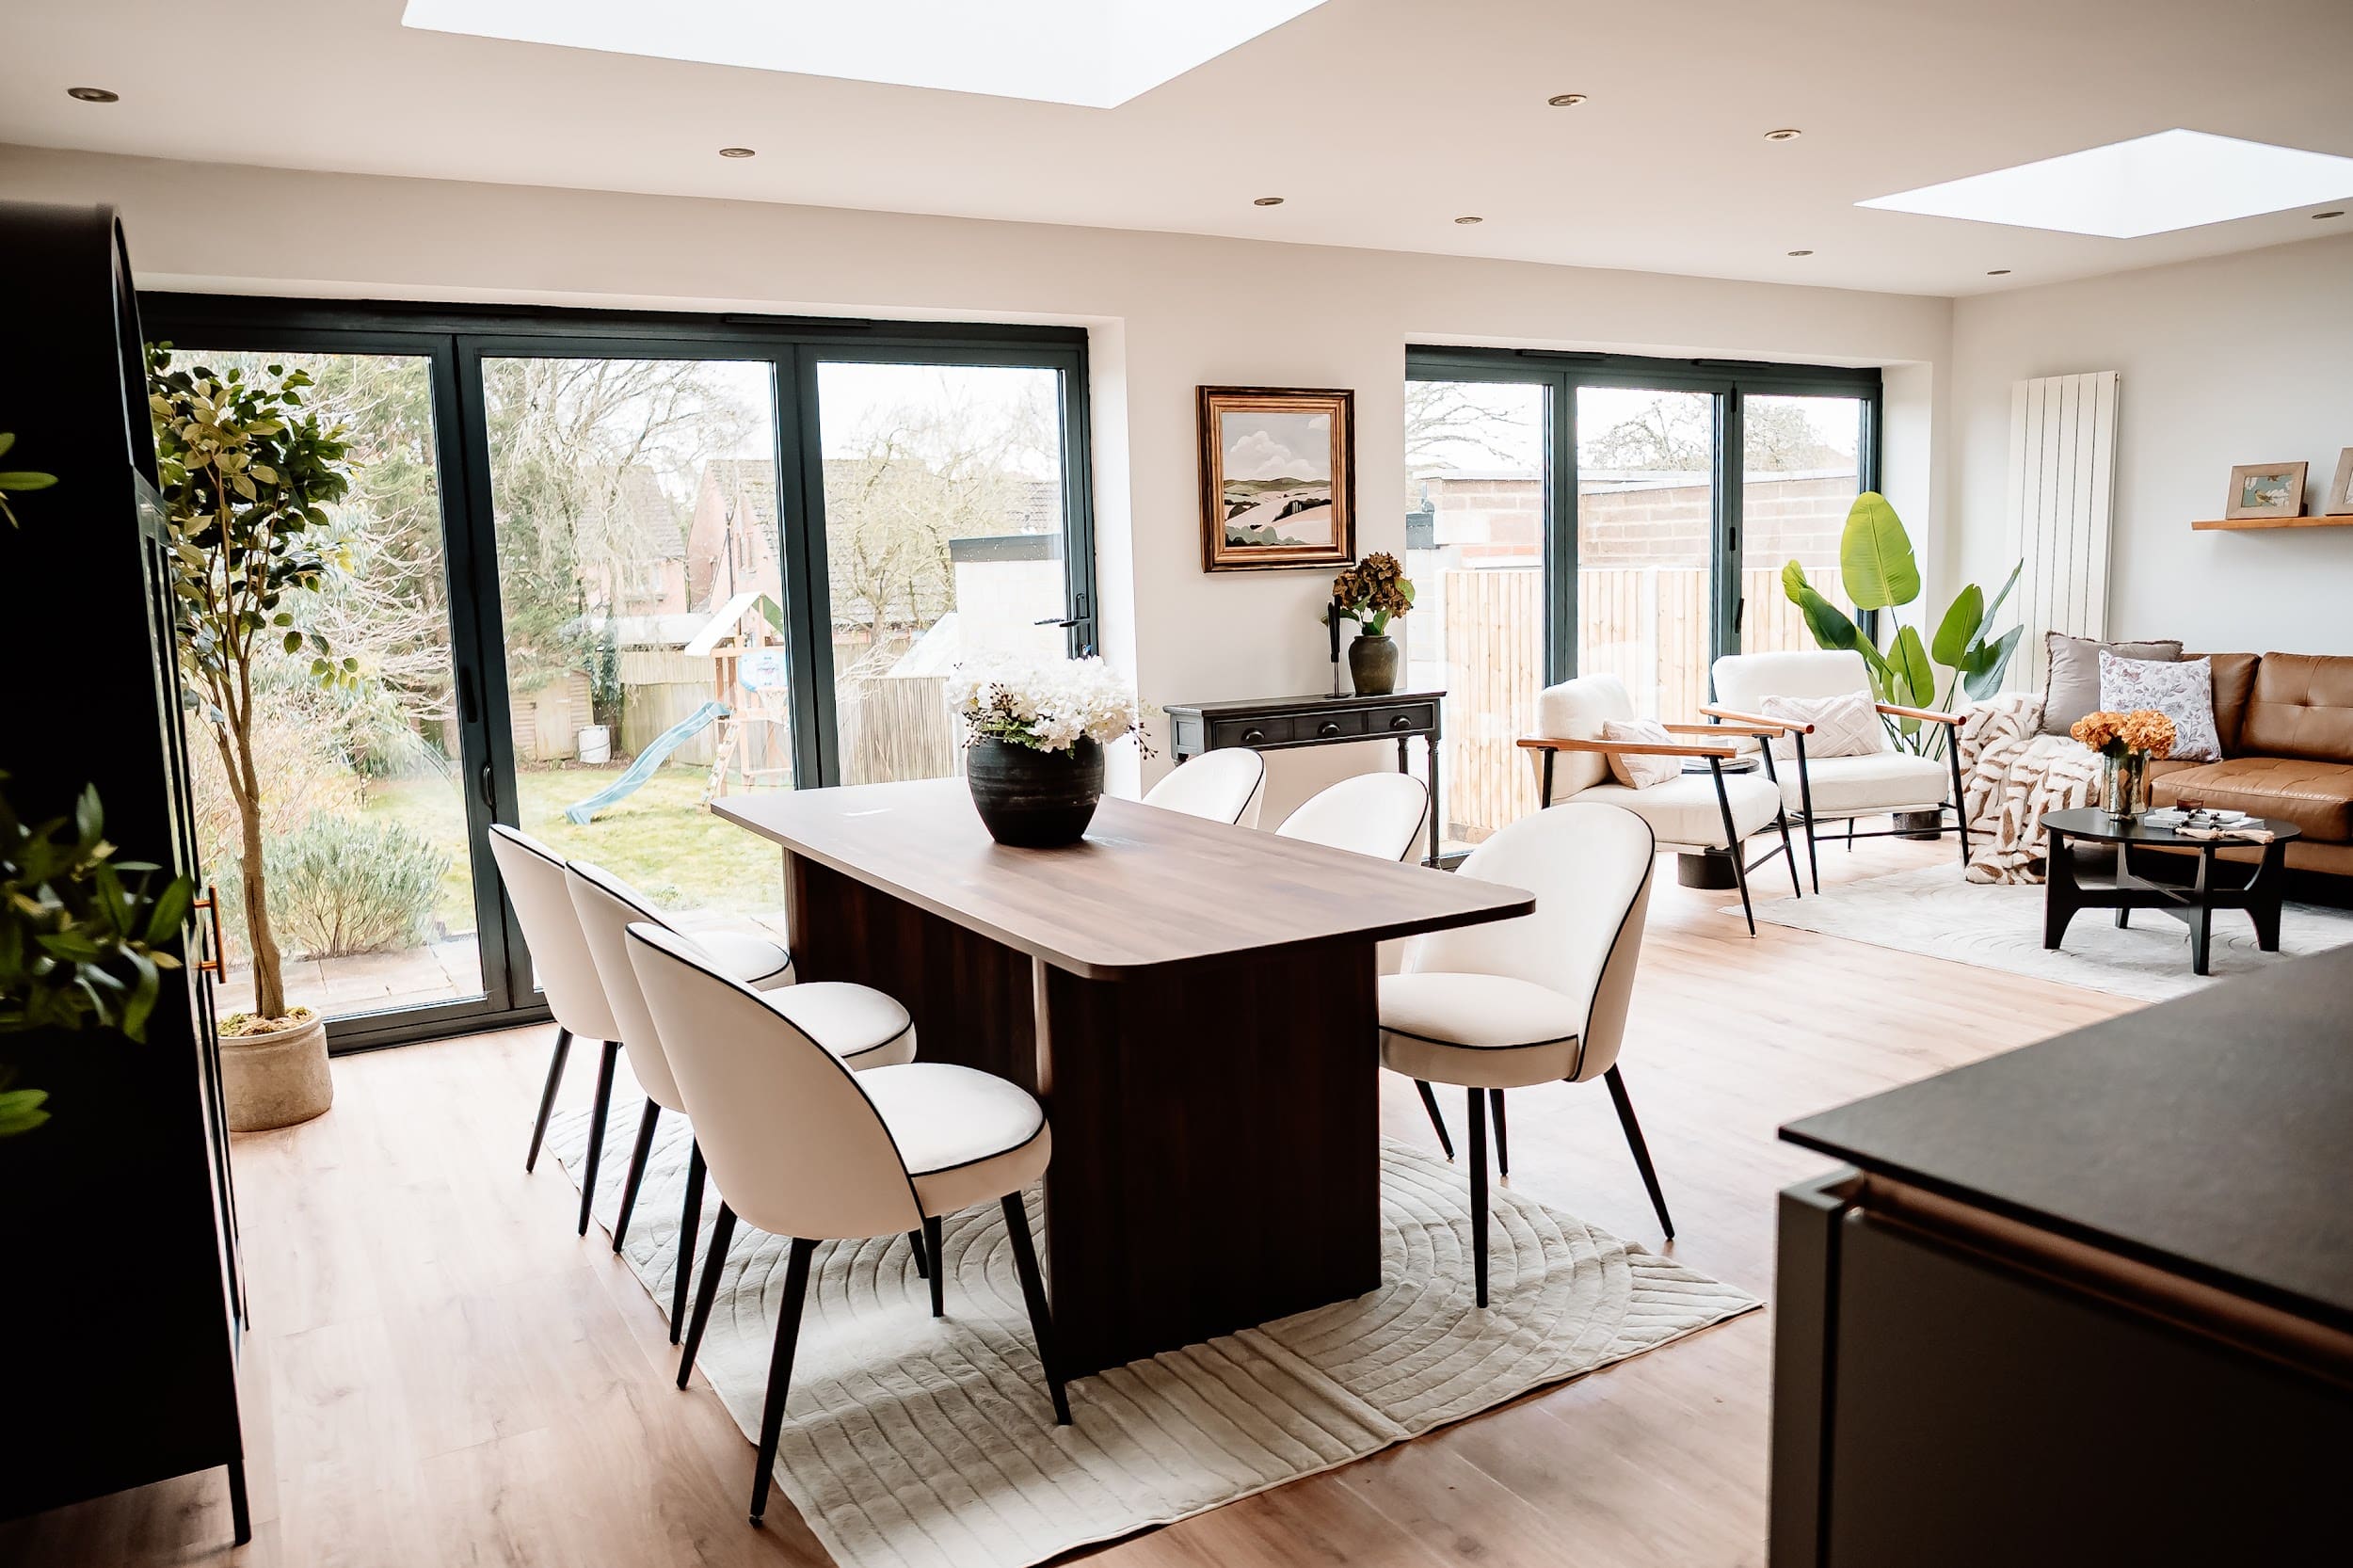
Modern Homes: Measurement Rules For Open-Plan Living, Compact Rooms And New-Build Layouts
Modern layouts look easy to stage until you realise open-plan rooms can feel like airport lounges: lots of empty space, no emotional anchor, and furniture floating without purpose. The fix is zoning, and zoning only works when your measurements are disciplined.
Open-plan: measure zones, not just walls
In an open-plan kitchen/living/dining area, you are really staging three rooms that share one rectangle.
Practical rules that work well:
- Give each zone a clear footprint you can defend:
- Living zone: often reads well at roughly 2.4–3.0m wide (rug width is a useful proxy).
- Dining zone: allow at least 900mm behind chairs, even if you reduce table size.
- Keep a clear “spine” walkway (commonly from entry → kitchen → patio doors) at 800–900mm.
Actionable step: tape the floor. Two strips of painter’s tape marking an 850mm route will stop you placing a console table “because it looks nice” and accidentally blocking flow.
Compact rooms: protect the photo angles
New-build bedrooms and lounges often photograph tight because doors open into the usable space and wardrobes steal wall length.
- Measure door swing arcs and keep furniture out of that zone by at least 50–100mm.
- Use shallower pieces where depth is the real problem (for example, a 350–450mm depth console instead of a 550mm sideboard).
Actionable step: in a small lounge, choose one hero piece (usually the sofa) and then build with nesting tables or small round side tables so you don’t create a hard “block” in the walkway.
New-build quirks: radiators, sockets, and media walls
Buyers expect modern convenience, so your placement needs to respect it.
- Measure radiator projections (often 80–120mm) and keep curtains and sofas clear so the room reads maintained, not improvised.
- If you stage a TV wall, measure the viewing distance and avoid placing the sofa closer than about 2.0m unless it’s clearly a snug.
Actionable step: stage a work-from-home point only if you can show 600–750mm behind the chair. If you can’t, use a wall shelf and a stool to imply a “laptop perch” instead of a full office.
If you want examples of modern rooms that sell without overspending, the approach in staging rooms that sell: a budget-smart guide for 2026 aligns closely with how we prioritise measurements and impact.
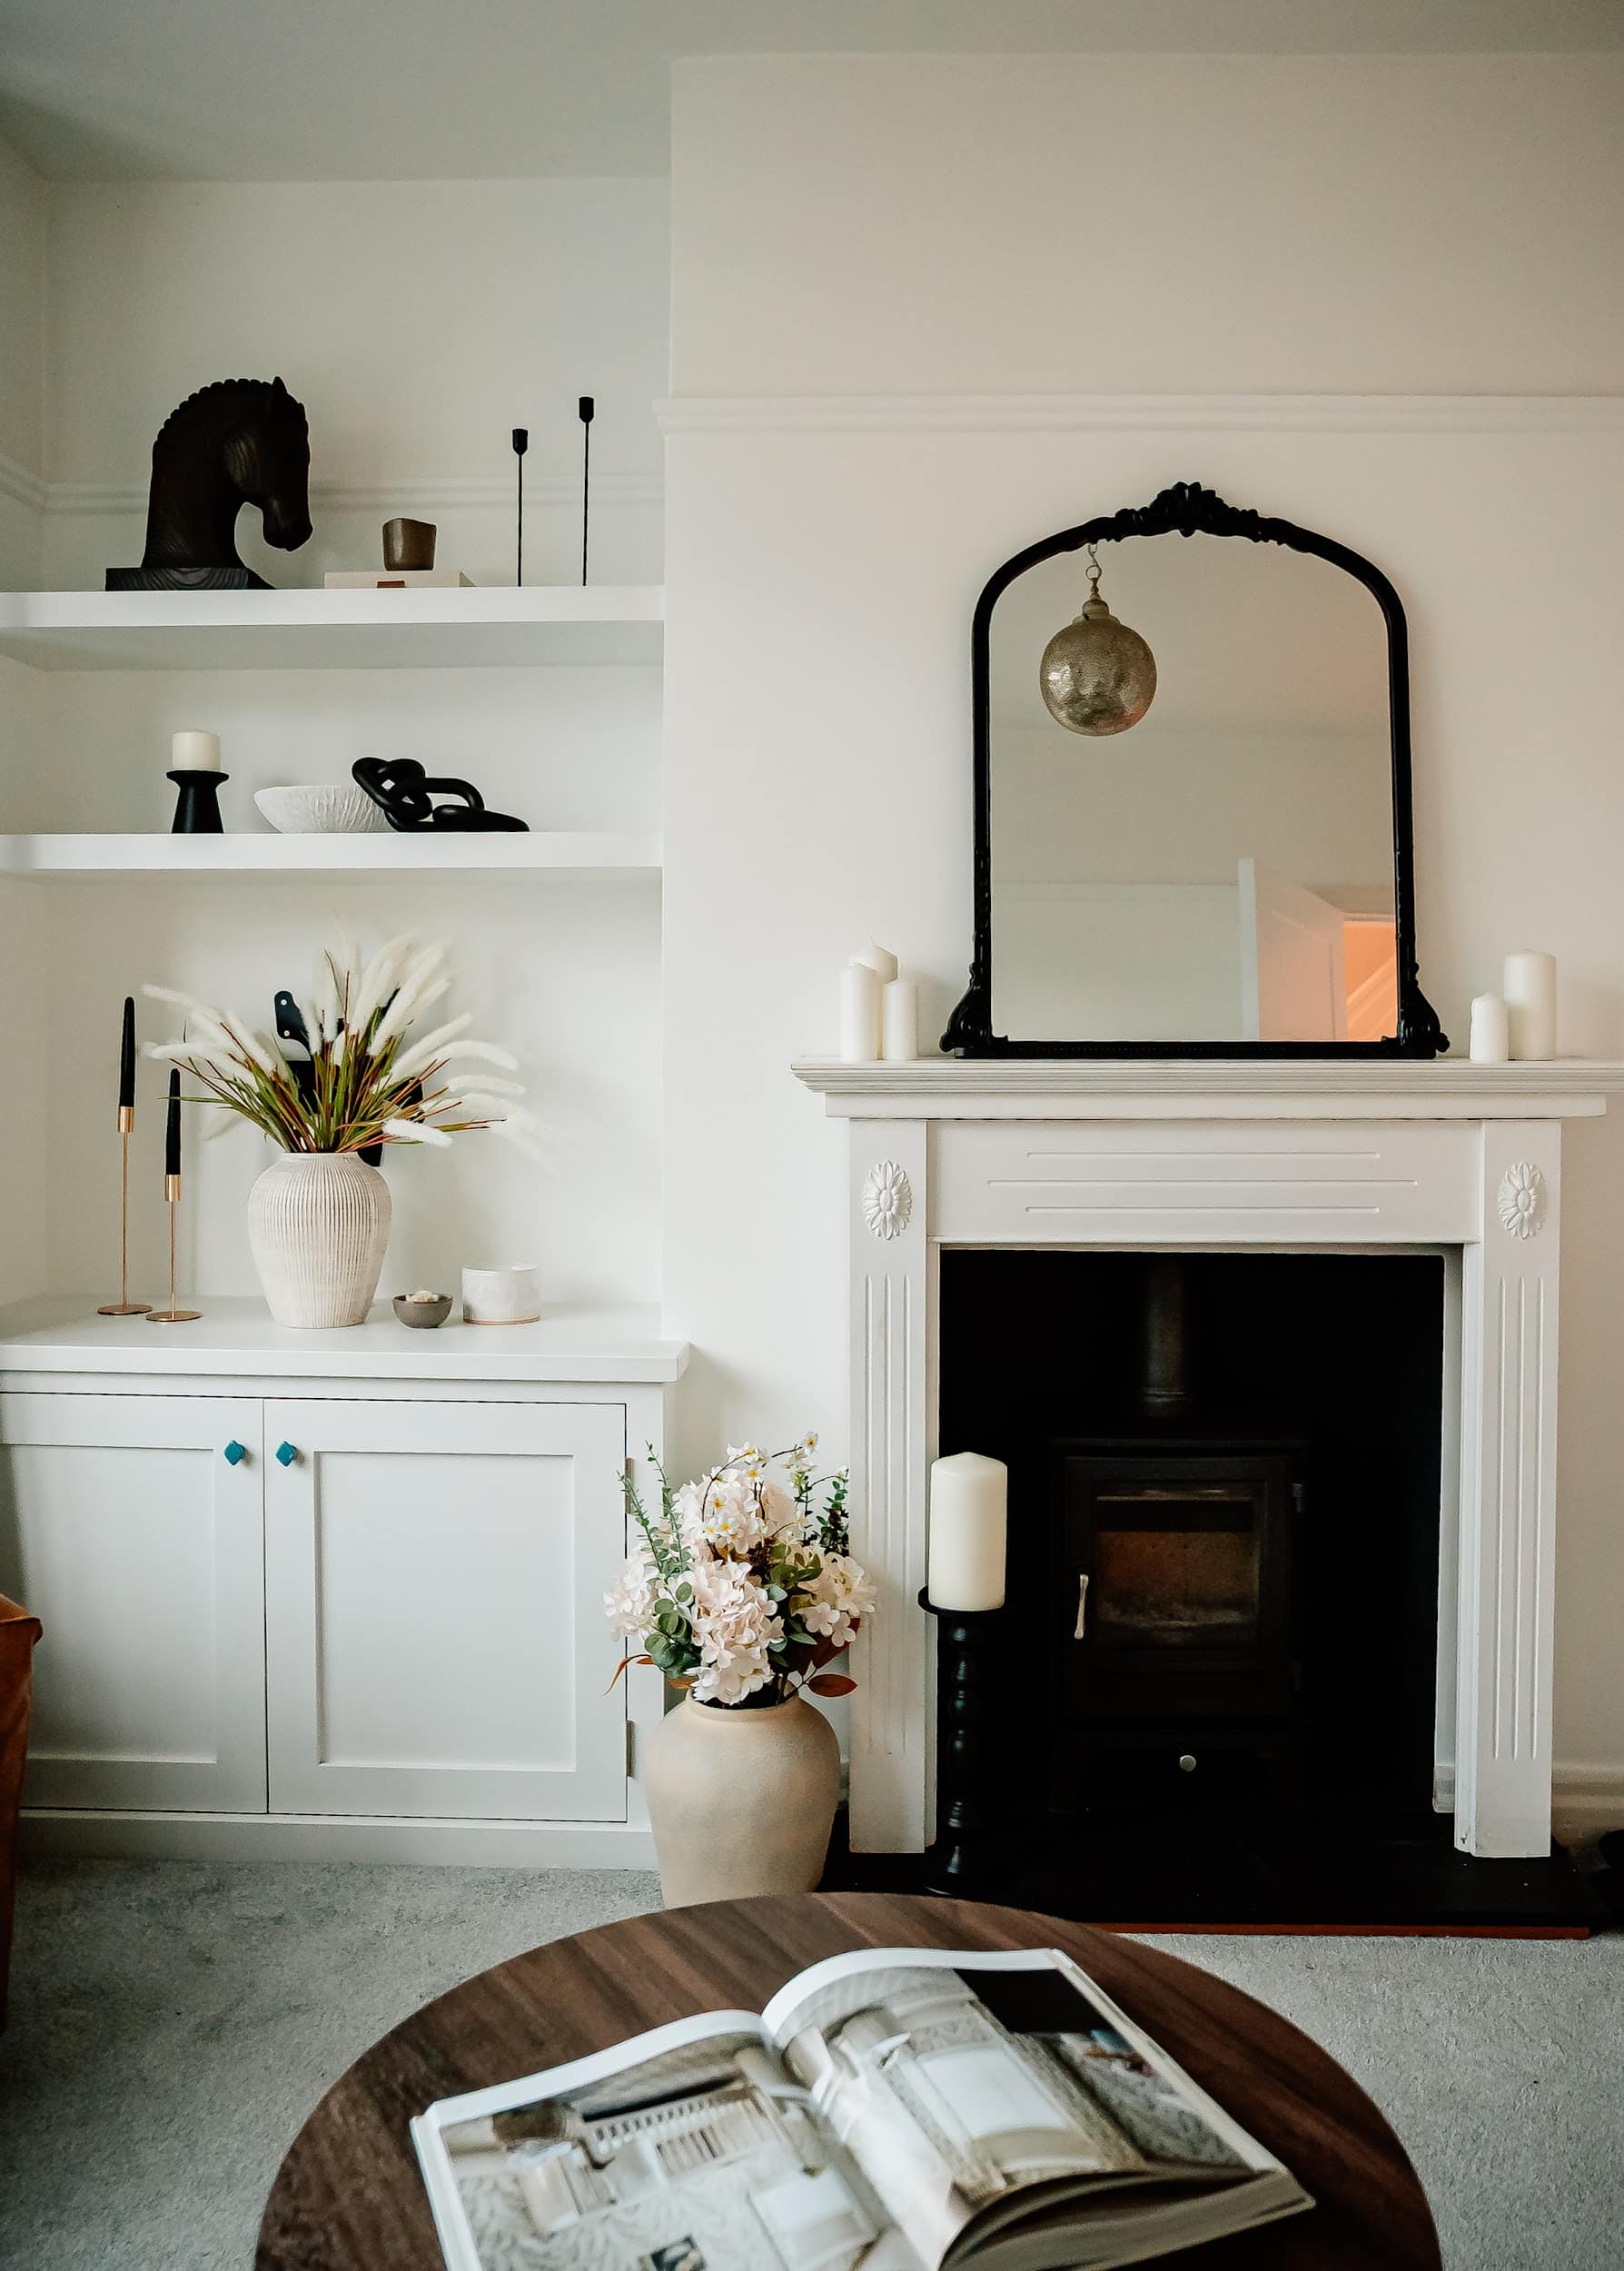
Period Homes: Measurement Rules For Character Rooms, Chimney Breasts And Awkward Angles
Period properties win hearts, but they can also create doubt: a gorgeous fireplace that breaks up the wall, a bay window that steals floor area, or a hallway that feels like a corridor on a ship. Your job in staging is to respect character and prove practicality through measured placement.
Chimney breasts: centre the room without shrinking it
A common mistake is pushing everything hard against walls “to create space”. In many period rooms, that actually makes the centre feel empty and the edges feel cluttered.
- Measure the chimney breast width (often 1.3–1.8m) and treat it as the visual centre.
- Aim for symmetrical spacing where possible (even if it’s not identical furniture): for example, keep the distance from fireplace to the nearest chair arm similar on each side.
Actionable step: if the room is narrow, float a sofa 100–200mm off the wall and use a slim console behind it. That can preserve a clean walkway while stopping the room feeling like a waiting room.
Alcoves and bays: use shallow depth to keep width
Alcoves invite overfilling, especially if you try to “make storage”. But deep furniture narrows the room exactly where you need breathing space.
- In alcoves, choose pieces around 250–300mm deep (shelves, slim cabinets) so you keep the room’s perceived width.
- In bay windows, measure the chord width (wall-to-wall across the bay) and use round pieces to soften angles:
- A 700–900mm round bistro table often fits where a square table looks forced.
Actionable step: if a bay is your selling feature, stage it as a lifestyle moment (chair + lamp + small table) and keep at least 750–800mm clear behind it so buyers can step in and enjoy it.
Awkward angles and narrow halls: prioritise safe, natural movement
Older homes often have pinch points: where a stair turns, where a door meets a radiator, where a cupboard protrudes.
- Identify the tightest point and measure it. If it is under 750mm, you must keep that route visually clear.
- Use wall-mounted or shallow pieces (for example, 200–300mm depth hooks and shelves) rather than freestanding consoles.
Actionable step: in a narrow hallway, stage vertically (mirror, artwork, lighting) and keep the floor line clean. Buyers forgive narrowness: they don’t forgive tripping hazards.
Period homes also benefit from a tidy “last 15 minutes” routine before photography and viewings, because dust and clutter show more against character features.
Virtual Vs Physical Staging: How Measurements (And Tolerances) Differ
Virtual staging can make a hard-to-let flat look like a boutique hotel suite in 20 minutes, but it can also backfire if the furniture scale is wrong when a buyer visits. The difference comes down to tolerances: what looks fine in a photo can feel impossible in real life.
Physical staging: your measurements must survive a viewing
When someone walks the room, their body becomes the measuring tool.
- A 700mm gap might look acceptable in a photo, but it feels tight when you carry a handbag or walk as a couple.
- If a bed blocks a wardrobe door by even 50mm, buyers notice immediately because they try it.
Actionable step: after you place furniture, do a “real use” test. Open every door fully, pull out every dining chair, and walk the primary route without turning your shoulders.
Virtual staging: you can cheat the eye, but you shouldn’t cheat the truth
Virtual staging lets you optimise the camera viewpoint, which can compress depth and make rooms appear larger. That’s useful for marketing, but you still need accurate base measurements.
- Build the virtual layout using the true room length and width, then select furniture sizes that exist in the real world (for example, a 1600mm sofa, not a fantasy 1200mm three-seater).
- Keep visual clearances credible. If you show 500–600mm beside a bed, make sure the real room can at least deliver a workable 600mm.
Actionable step: include one “scale anchor” in the photo set, such as a standard double bed or a normal dining chair, so buyers do not feel misled.
The practical rule we use
If you plan to do physical staging later, measure once and reuse the plan. If you plan to sell with virtual staging only, measure twice and be conservative with furniture size. You want excitement online, but you want reassurance at the viewing.
How To Measure And Plan A Staging Layout In 30 Minutes
When a property sits empty, you can lose a week waiting for “inspiration”. A timed measurement routine stops that. Here is a 30-minute process you can use before you buy furniture, hire a package, or brief a stager.
Minute 0–5: Do a quick sketch that includes constraints
Draw a simple rectangle for each key room and mark:
- Door positions and door swings
- Windows and radiators
- Chimney breasts, alcoves, and built-in cupboards
Actionable step: take one photo of each wall so you can double-check your sketch later without driving back.
Minute 5–20: Take the measurements that affect placement
Focus on “decision measurements”, not every skirting board.
Measure and write down:
- Room length and width (to the nearest 10mm is enough)
- Wall-to-wall widths where furniture will sit (for example, sofa wall, bed wall)
- Depth from windows to opposite walls (important in bays and narrow rooms)
- Obstructions: radiator depth, chimney breast projection, and any boxing-in
Actionable step: measure the narrowest circulation point (often between a sofa and a coffee table, or between a bed and a wardrobe). If it is below 600mm, you already know you need a smaller piece or a different layout.
Minute 20–25: Decide focal point and primary route
Pick one focal point per room:
- Modern homes: media wall, window wall, or patio doors
- Period homes: fireplace, bay, or feature wall
Then draw the main route and label it “keep 850mm”.
Actionable step: if your route crosses a dining area, rotate the table 90 degrees on your sketch until the chair pull-back stops cutting the walkway.
Minute 25–30: Drop in “standard size” furniture placeholders
Use realistic starter sizes:
- Sofa: 1600–2000mm depending on room
- Double bed: 1350 x 1900mm (plus space around it)
- Dining table: 1200–1600mm length or 1000–1200mm round
Actionable step: if you’re unsure, start smaller. A slightly smaller sofa with confident clearances sells better than a big sofa that makes viewers shuffle sideways.
If you want a professional to do this walk-through, measure, and turn it into an action plan you can carry out quickly, our process mirrors what’s described on the Home Staging Madders discovery call page: quick, practical, and focused on outcomes.

Room-By-Room Measurement Benchmarks (Living, Dining, Beds, Kitchens And Outdoors)
A buyer does not need perfect rooms, but they do need to see that the important ones work. These benchmarks help you stage the spaces that drive decisions, without guessing.
Living rooms (the “we can relax here” test)
The most common objection in empty living rooms is unclear function: people cannot tell where the sofa goes, so they assume the room is small.
Benchmarks to aim for:
- Primary walkway: 800–900mm clear
- Sofa to focal wall/TV: 2.2–3.0m
- Coffee table gap: around 400–500mm from sofa edge so it looks reachable but not cramped
Actionable step: in a long room, avoid pushing all seating to one end. Break the length with a rug and a console so the room reads as two usable parts.
Dining areas (the “can we host?” test)
Dining often gets staged last, but it signals lifestyle and value, especially in open-plan homes.
Benchmarks:
- Space behind chairs: 900mm
- Minimum comfortable table: around 1200mm long (or 1000–1200mm round)
Actionable step: if you cannot keep 900mm all around, stage a 2–3 person setting and position it so the pulled-back chair does not block the main route.
Bedrooms (the “does a real bed fit?” test)
Bedrooms sell reassurance. If the bed blocks doors or you cannot access the wardrobe, buyers mentally subtract value.
Benchmarks:
- Each side of bed: 600mm where possible
- Foot of bed: 750mm
Actionable step: if a double room is tight, use a double bed but scale the bedside tables down (think 300–400mm wide) and use wall lights to free surface space.
Kitchens (the “can we cook without bumping?” test)
Buyers read kitchen usability very quickly, and tight aisles create an instant “no”.
Benchmarks:
- Aisle between runs / around island: 1000–1200mm (900mm is the minimum that tends to feel workable)
Actionable step: remove anything that narrows the aisle for photos, such as bins, freestanding islands, or bar stools that force people to sidestep.
Outdoors (the “is there a lifestyle here?” test)
Even small outdoor spaces can add perceived value, but only if the furniture fits without blocking access.
Benchmarks:
- Bistro set: allow roughly 1500mm depth
- Dining table + chairs: allow roughly 1800–2400mm depth depending on chair pull-back
Actionable step: keep a clear path to the garden gate or patio doors. A single blocked route can make an outdoor space feel smaller than it is.
If you like seeing what these benchmarks look like in real projects, the case studies in the Home Staging Madders portfolio are a good reference point for proportion and placement across different property styles.
Budget, Timeline And ROI: Turning Measurements Into A Costed Staging Plan
The fastest way to overspend on staging is to buy furniture first and solve fit later. The fastest way to protect ROI is to let measurements dictate scope: stage only what you can stage convincingly.
Build a “measurement-led” priority list
When budgets are tight, prioritise rooms where clearances directly change buyer belief:
- Living room (proves day-to-day comfort)
- Main bedroom (proves the home fits a real bed layout)
- Kitchen / dining (proves the lifestyle and flow)
Actionable step: if you can only stage two spaces, stage the living room and main bedroom, then make the kitchen photo-ready with decluttering, lighting, and a simple styling kit.
Translate measurements into a shopping/hire list
Use your plan to specify sizes before you spend:
- Sofa length target (for example, 1800mm max)
- Dining table size (for example, 1200mm round)
- Bed size and clearance targets
- Depth limits for consoles and storage (for example, 350mm max in tight routes)
Actionable step: write these numbers into the brief you send to your staging partner. It prevents “nice but too big” pieces turning up on install day.
Timeline: where measurements save the most time
A typical staging timeline goes wrong in three places: deliveries, returns, and last-minute rework.
- When you measure properly, you reduce returns because furniture fits first time.
- When you plan walkways, you reduce rework because the layout is decided before styling.
Actionable step: schedule your measuring session before photography is booked. If your photographer is coming on Friday, measure on Monday and lock the furniture list by Tuesday.
ROI: connect spend to the friction you are removing
You are not paying for furniture: you are paying to remove objections like “too small”, “awkward”, and “not enough space for dining”. Measurements help you target spend exactly where it changes perception.
If you need a realistic view of what professional staging can cost in the UK (and what is normally included), the breakdown in home staging fees in helps you scope the project before you commit.
Actionable step: if the property is high value or time-sensitive, treat staging like a marketing line item. A small improvement in speed to sale can matter more than chasing an extra 1–2% if it avoids a price reduction.
Conclusion
Staging measurements are not admin: they are the quickest way to turn an empty property into a home buyers can understand in seconds. Modern homes need measured zoning and clear routes so open-plan space feels intentional, not vague. Period homes need measured balance around fireplaces, alcoves, and angles so character feels liveable, not difficult. If you take one action from this guide, make it this: measure your primary walkways and your key “use” distances first, then choose furniture sizes that protect them. That is how you reduce doubt, improve photography, and give your property a stronger chance of selling or letting without unnecessary negotiation.
Staging Measurements: Frequently Asked Questions
What are the key differences in staging measurements between modern and period properties?
Modern homes focus on open-plan flow, measuring clear walkways (800–900mm) and flexible zones, while period homes prioritise centred furniture around features like chimney breasts, balanced alcoves, and maintaining circulation through narrower halls with at least 750–800mm clearance.
Why are circulation clearances important in home staging?
Clear circulation paths of 800–900mm main walkways allow buyers to move naturally, making the property feel liveable and spacious. Proper clearances reduce buyer doubt by proving the home works in real life, which can lead to faster sales and better offers.
How do staging measurements help increase a property’s sale speed and value?
Accurate measurements enable staged rooms to demonstrate real-life usability with suitable furniture sizes and walkways, helping buyers easily imagine living there. This reduces objections like ‘too small’ or ‘awkward layout’, leading to increased viewings, quicker sales, and often higher offers.
What measurement benchmarks should I use when staging a living room in a modern home?
Aim for a main walkway clearance of 800–900mm, sofa to focal wall distance of 2.2–3.0m, and 400–500mm between sofa and coffee table. Mark clear zones with rugs approximately 2.4–3.0m wide to define seating and dining spaces effectively.
Can virtual staging replace physical staging, and how do measurements differ?
Virtual staging can enhance photos but must use true room measurements and realistic furniture sizes to avoid buyer disappointment. Physical staging requires exact clearances to ensure comfortable movement during viewings since buyers physically interact with the space.
How should I measure and plan a staging layout efficiently?
In 30 minutes, sketch each room noting doors, windows, chimney breasts; take key measurements like length, width, and narrowest circulation points; identify the focal point and primary walkway ensuring at least 850mm clearance; then place standard-size furniture placeholders to check layout usability.